In this case, we show you some basic weathering techniques, such as filters and washes, which you can apply on 15mm vehicles.
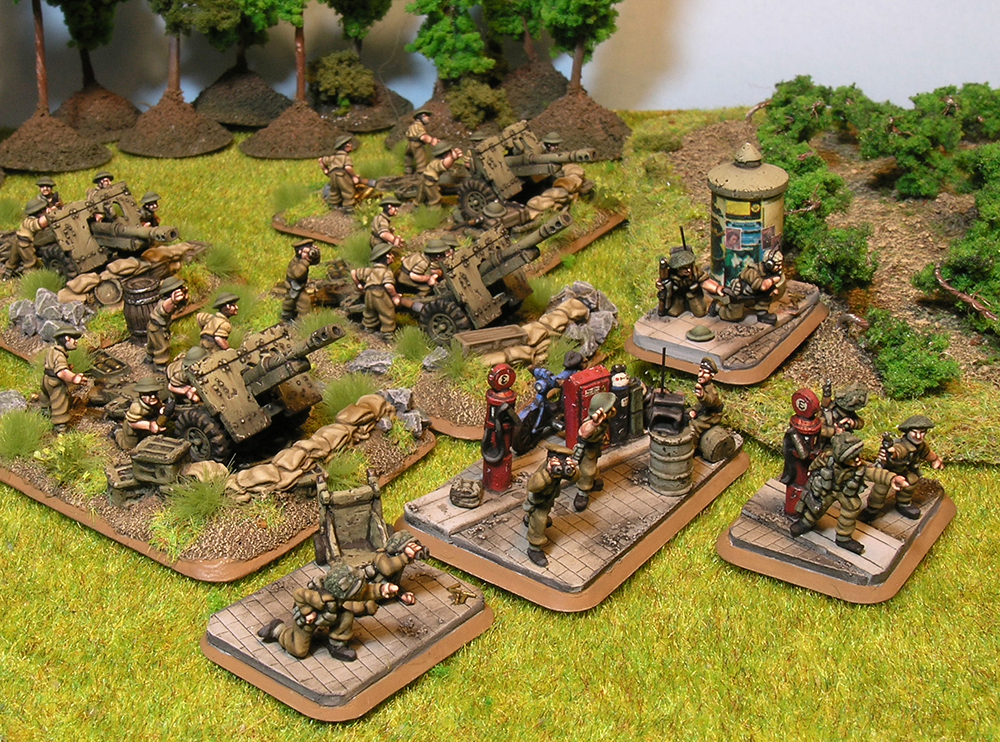
This was my first videotutorial (I have one older, but the quality is terrible), where I explained with detail some weathering techniques. In that moment I only used these: filters, whases, chipping and streaking effects. Despitue you can use more techniques, like dust effects, pigments, oil effects, etc. With only these four techniques and little time you can get much contrast.
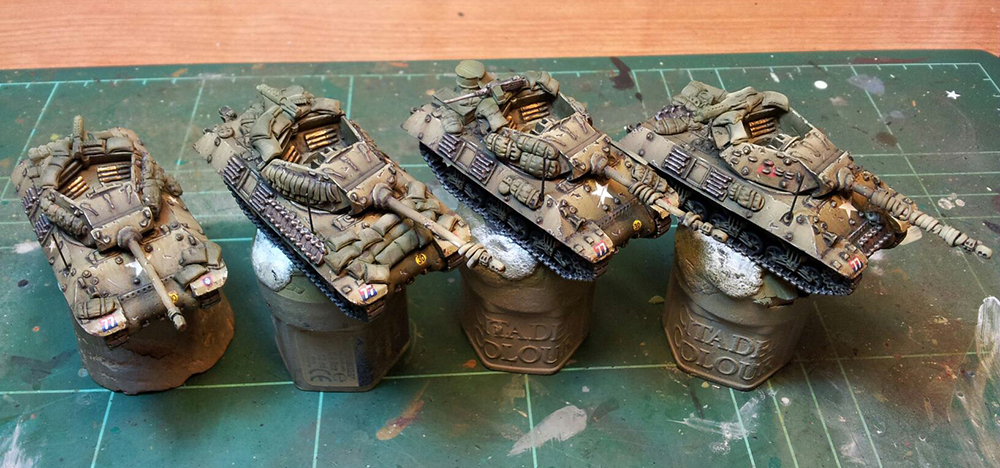
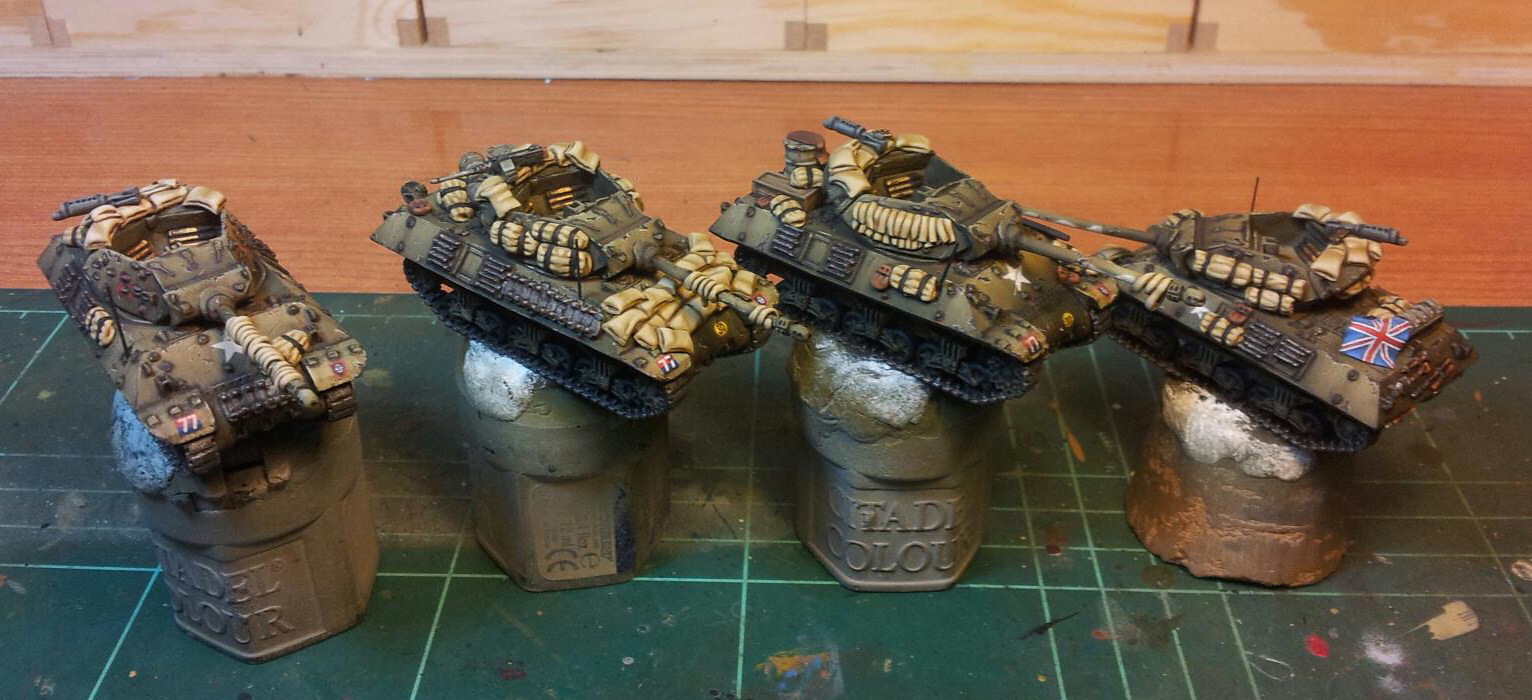
These are the steps that I’ve followed. Indeed, this guide can be used directly to paint allied vehicles!:
1.- Base with Olive green (XF-58, Tamiya)
2.- First light with Khaki Olive Drab (UA 221, LifeColor)
3.- Second light with Olive Drab Faded type 2 (UA 224, LifeColor)
4.- Third light with UA 224 + white (1:1)
5.- Detials with acrylics: tyres and tracks
» Apply satin varnish

6.- Apply a brown filter, such as Filter for NATO tanks (AK-076)
7.- Apply a dark wash, such as WASH for NATO camo vehicles (AK-075)
8.- Remove the excess of wash with a brush moistened in solvent
9.- Chipping effects using a sponge and a mix of black and flat brown (1:1). We can also use Dark Rust (302, Panzer Aces) or Chipping color (AK 711)
10.- Check chippings and add news using a brush
11.- To win realism, we can profile chippings with Iraki sand (819, Vallejo)
12.- Streaking effects with Light Rust (301, Panzer Aces) diluted (1:4)
» Apply satin or matt varnish
If you are interested, you can find more information in the original source (in SPANISH): HeresyBrush – Weathering effects on 15mm vechiles.
This is amazing work.
Do you have a recommendation for steps 1-3 using Vallejo Model Colors? I know that XF-58 and VMC 890 are equivalent.
Thanks in advance. Tim