After two months living in Finland (by the way, I think it´s been the best decision I’ve taken!), I decided to paint a Finish tank. First I thought in a captured T-26 tank, but immediately Angusin sent me an Stug III G.
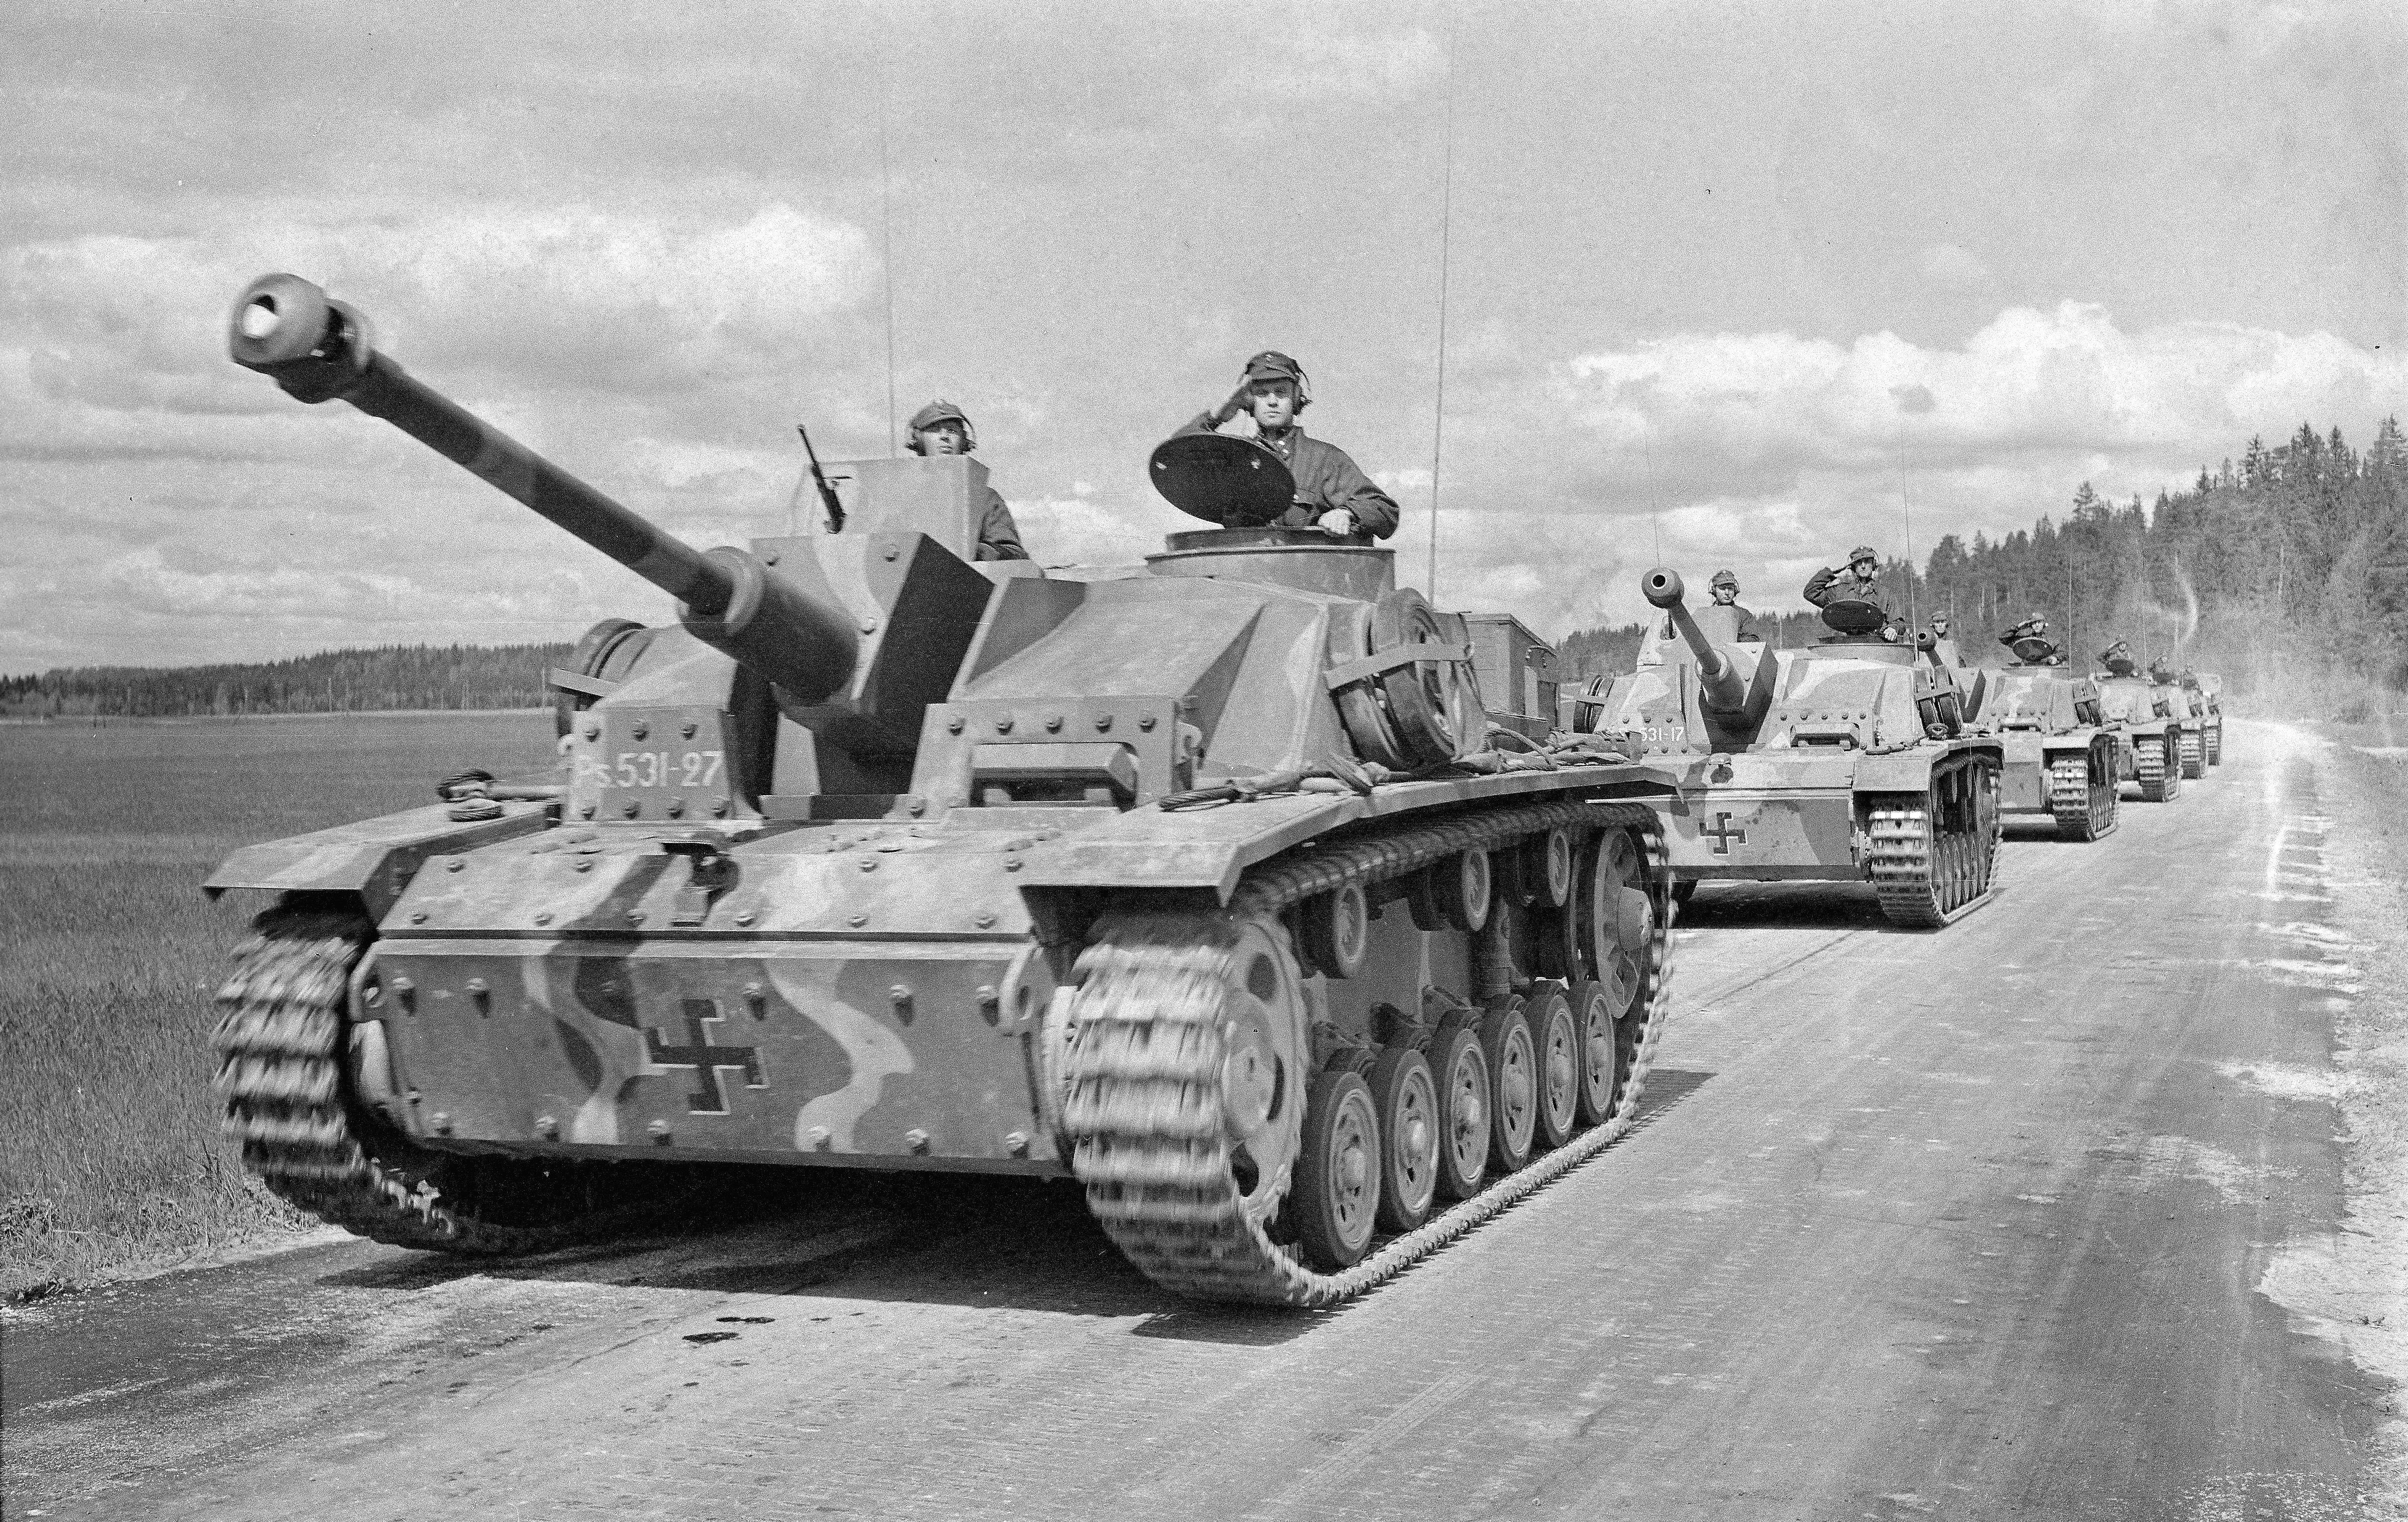
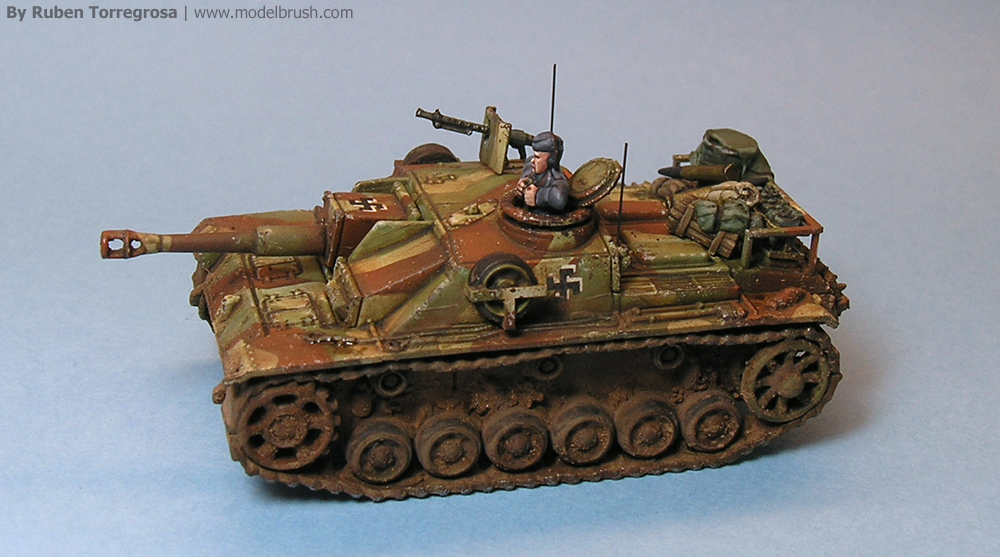
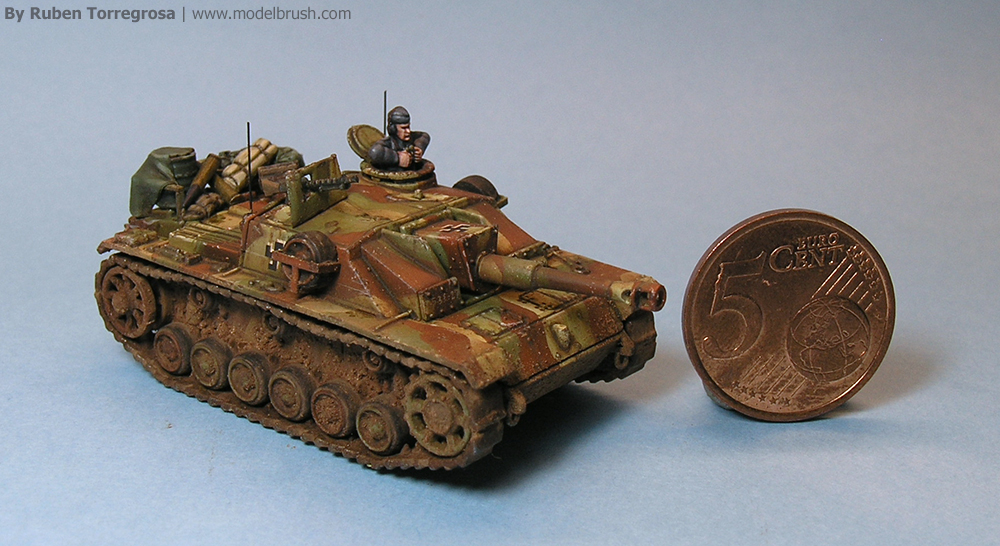
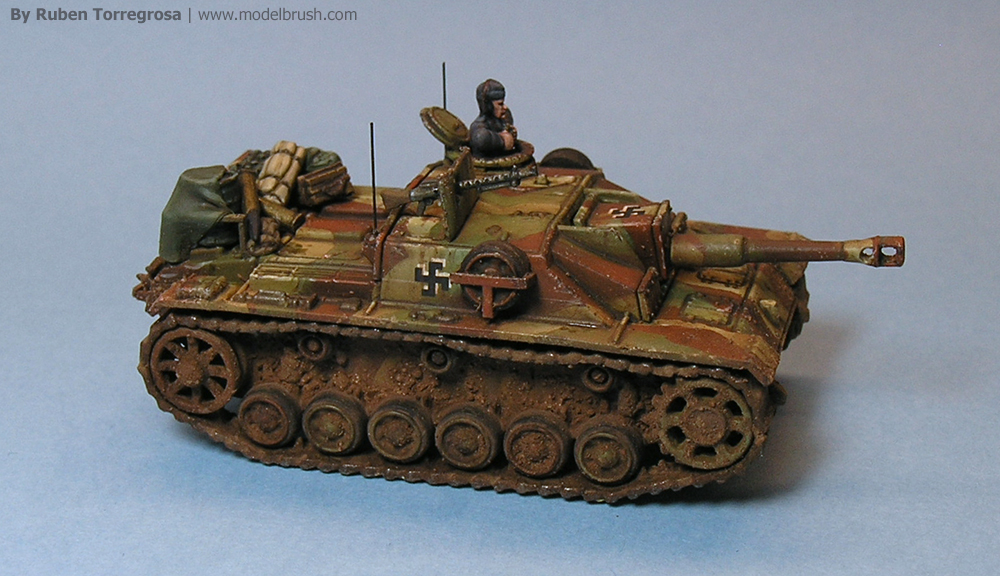 Thanks to Antonio Jesus, and other friends, from Wargames Spain, I collected enough information to paint an historical camouflage. I decided to simulate a tritonal camouflage with yellow, green and brown. I´ve used the following picture such as inspiration, the Stug III G nº 531-27.
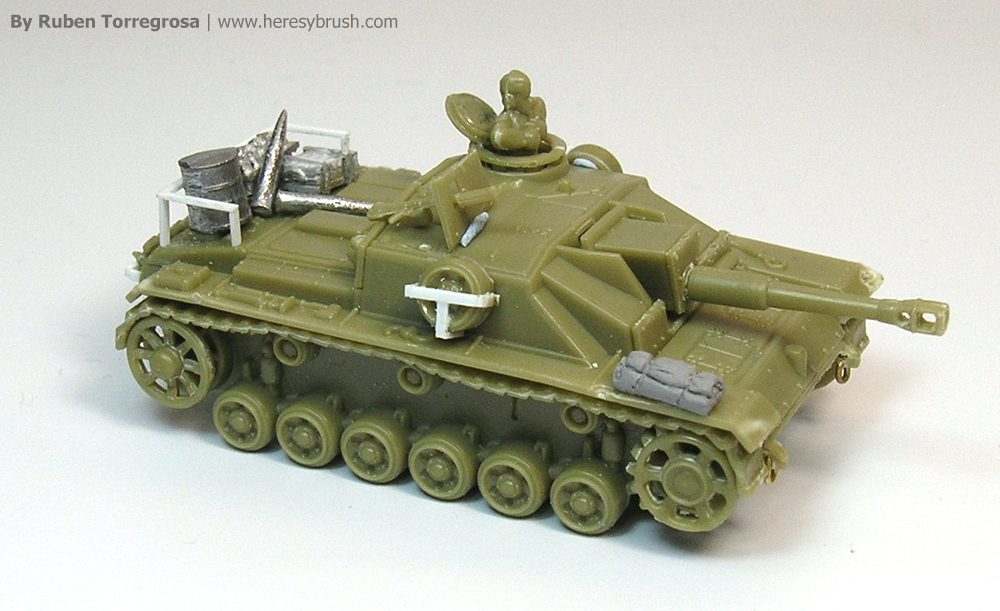
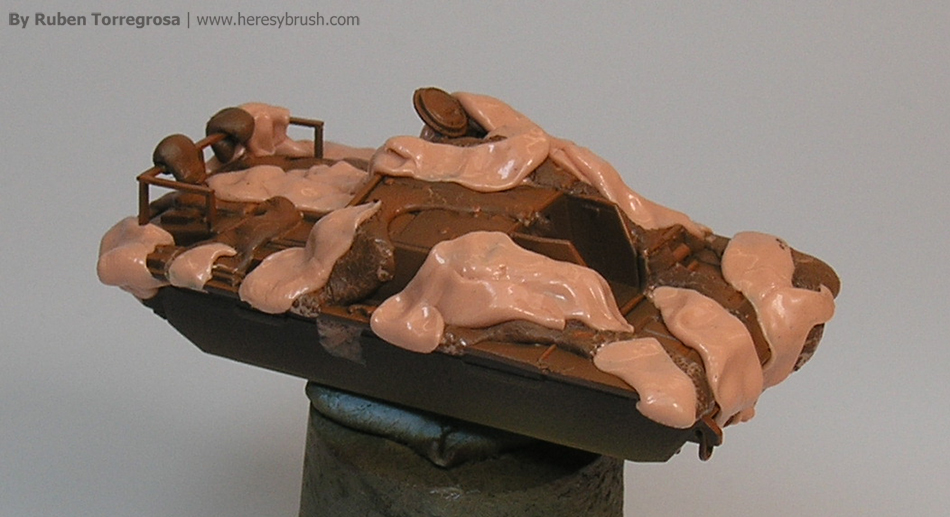
In first place, I modified the original Stug III G from The Plastic Soldier. Using plasticard of 2mm from Evergreen, I created a platform on the rear and I prepared a new support in T-form for the fifth wheels. Finally, I added different elements of equipment from Battlefront and Skytrex.
 Then, I started painting the camouflage. I decided to use this colors:
- Yellow: german dunkelgelb (from the AK-Interactive Dunkelgelb modulation set)
- Brown: german rotbraun (from the AK-Interactive German Camouflages modulation set)
- Green: olive drab (from LifeColor OliveDrab modulation set)
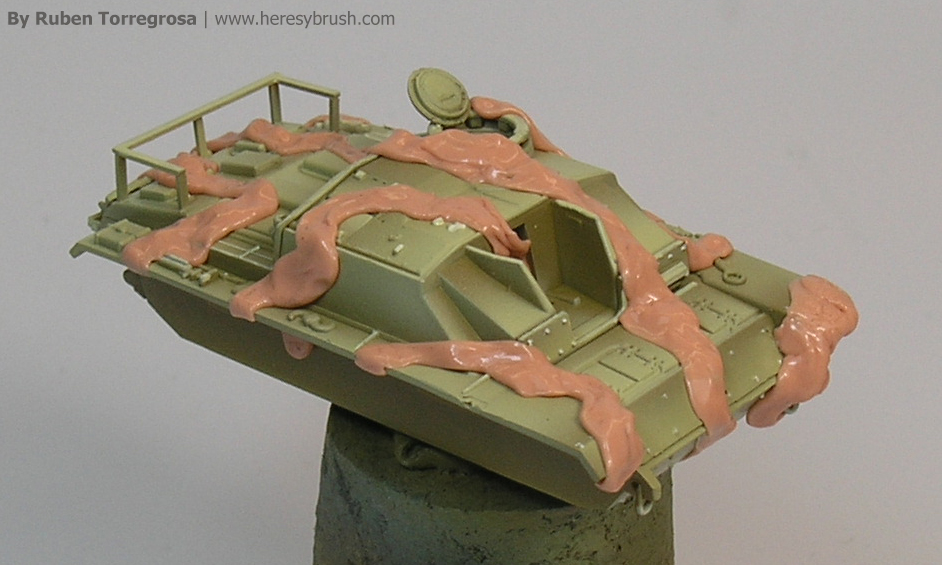
In every color I used three different tones: shadow, intermediate and light. Although I painted an extra light in the yellow color, to get a bit more contrast. Because this camouflage had hard edges I decided to use SillyPuty (or BluTack, or any adhesive putty). I started painting the yellow color, because it showed a small snake pattern. And is easier to mask this kind of pattern in the start than in the end. I painted a complete modulation. Then, I masked the yellow. I used a small amount of putty because the size of the yellow stains is too smaller than the other colors. I used the edge of a brush to distribute the putty.
 Once the putty is placed, I paint the brown color, applying a complete modulation once more time. It’s important to keep the same illumination pattern used in the yellow!. And I repeat the same process, before painting the green. I masked part of the brown, and I painted the green modulation. Note, green and brown occupy the same space.
 After paint all colors, I put Finish decals from Minairons. And before starting with the weathering effects, I applied a satin varnish in order to protect the acrylic paint. If you are interested in the weathering effect, you can check this video: how to paint 15mm German tanks. And to know how recreate the dry mud, you can check this other tutorial: how to make mud.
In addition, if you are interested, you can find a tutorial about how to do dusty roads in HeresyBrush.
Nice tank and excellent cammo. Thanks for sharing the steps
Excellent handi-work as usual!
Some comments though, if you want to build a more accurate Sturmi in the future:
* The Finns didn’t have any shortbarreled StuHs with the 105mm howitsers, only the longbarreled 75mm StuGs.
* The Sturmis were equipped with a standarlized stowage box at the rear, this picture from the Enso parade shows it quite clearly: http://sa-kuva.fi/static/81/20/118120_r500.jpg
* You put the «hakaristis» upside down, the white «shadow» should be downwards.
* The MG34 was replaced by the Finns with a Soviet DT machinegun, but it really dosn’t show that much in this scale.
* The colors are also a bit of, they are a bit to «yellow», some good examples on what it should look like, and a ton of other information can be found at Andreas Lärkas excellent site: http://www.andreaslarka.net/assaultguns.html
Great comment @saturnismus! thanks for the info!
Hi,
Great great comment Saturnismus, thank for your time!