While ago we show you a fantastic tutorial Jose Luís Diaz “Porta”, about how recreate a disc camouflage in a Hetzer tank, using the Bolt Action model in 28mm (1:56). Now, you can enjoy the second part: the weathering.
 You can read the first part of the article following this link:
https://blog.modelbrush.com/ambush-camouflage-on-28mm-bolt-action-hetzer
Once we have painted the camouflage, we can start applying the weathering effects. But first, we should paint some details.
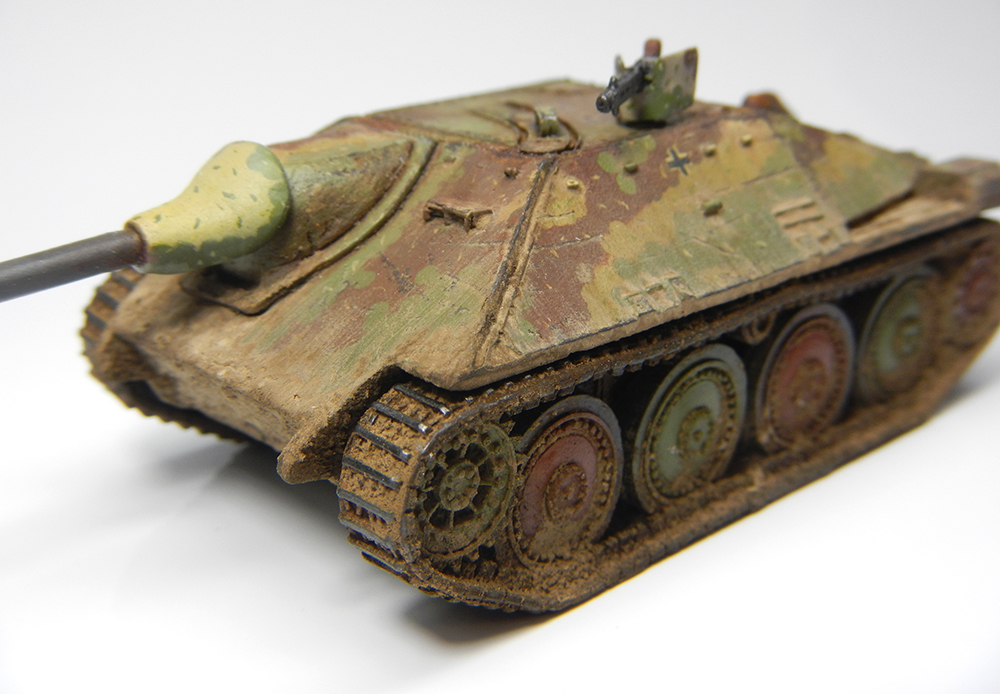
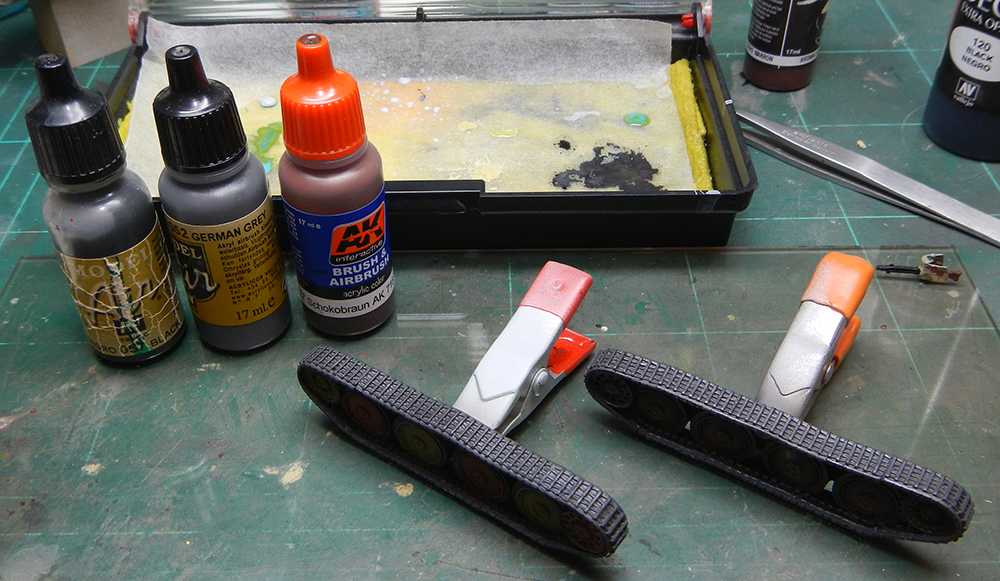 1. Now we paint the tracks. First we apply a mixture of brown, grey and black, which provides us a proper tone for the metal, and then we paint the wheels in brown and green, such as the pattern showed in the book.
 2. We prepare with some airbrushing inks a couple of tones which can serve as filters when they are applied by airbrush. These filters will unify a little the different tones we have used in the camouflage. Therefore, the tones will be something between the three different colors: green, brown and yellow.
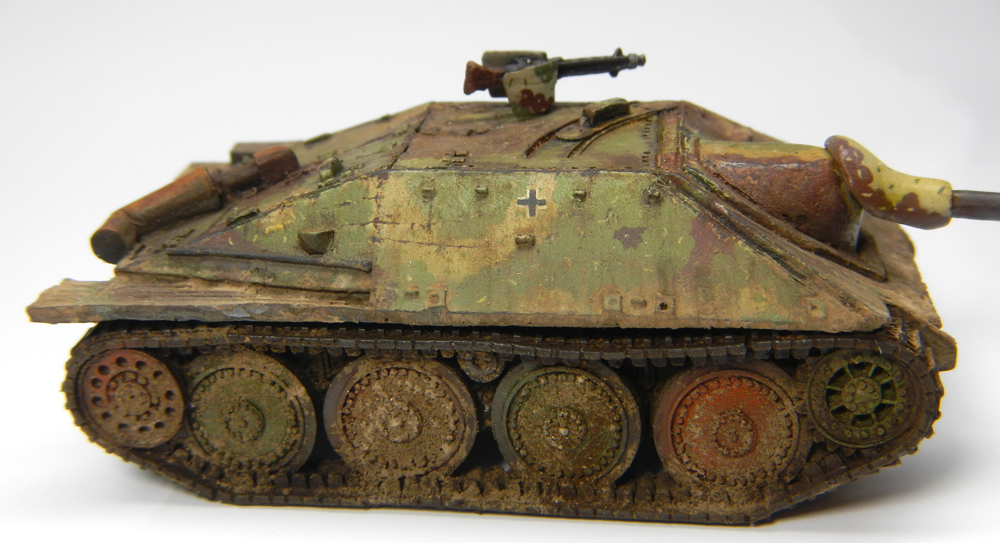
 3. We paint the BalkenKreuz in both sides using a brush, stencil or decals. Once we have finished the “basic pahse” of color, we can start with the weathering effects.
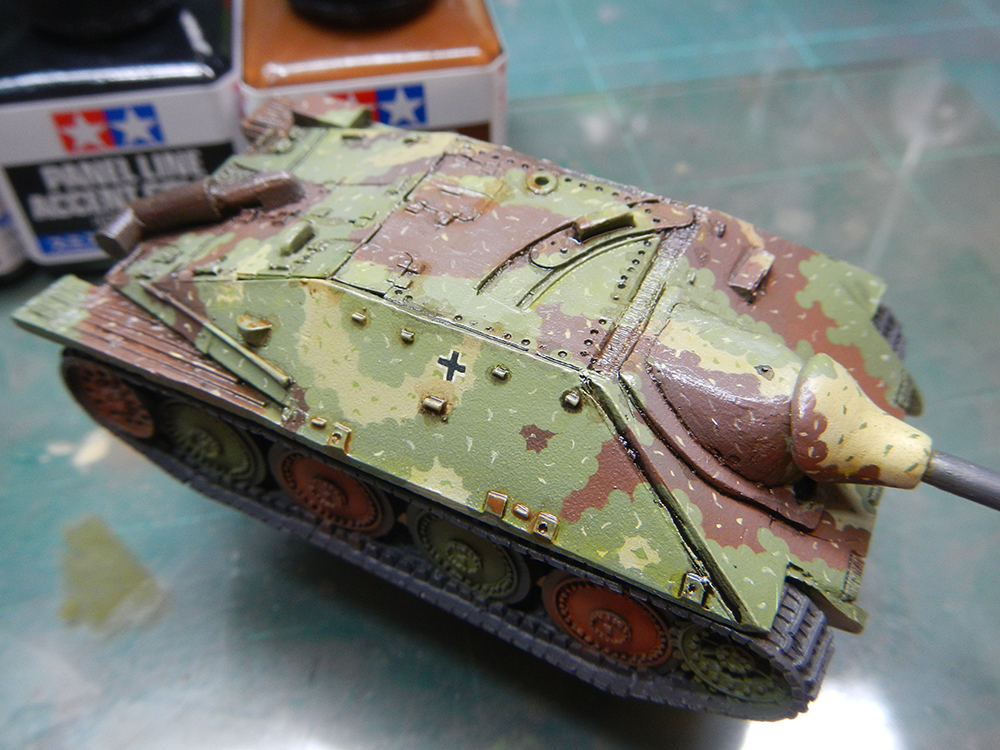 4. First, we have to define panels and details using the Tamiya panel line accent colors. We can use different tones of brown and black to get more interesting points. Once they are dry to the touch, we can remove the excess with a brush moistened in solvent.
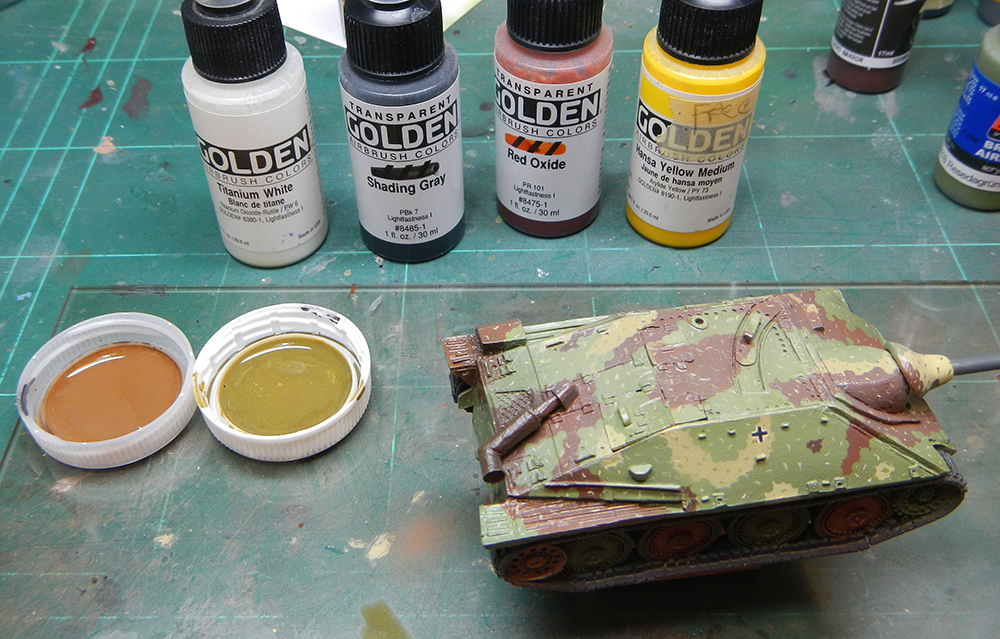
 5. On a carboard we put a selection of oils. The colors selected should be complementary to the colors used in the vehicle (in this case, the same colors used in the camouflage, plus some browns for example). We wait an hour before using the oils in order to remove the excess of the oil, which it’s absorbed by the cardboard.
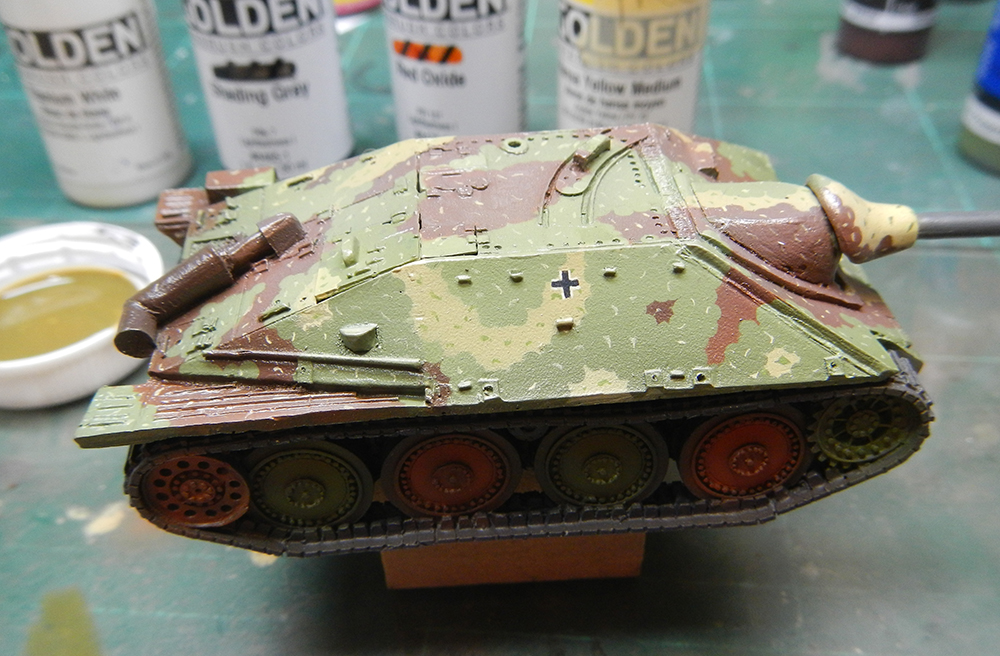
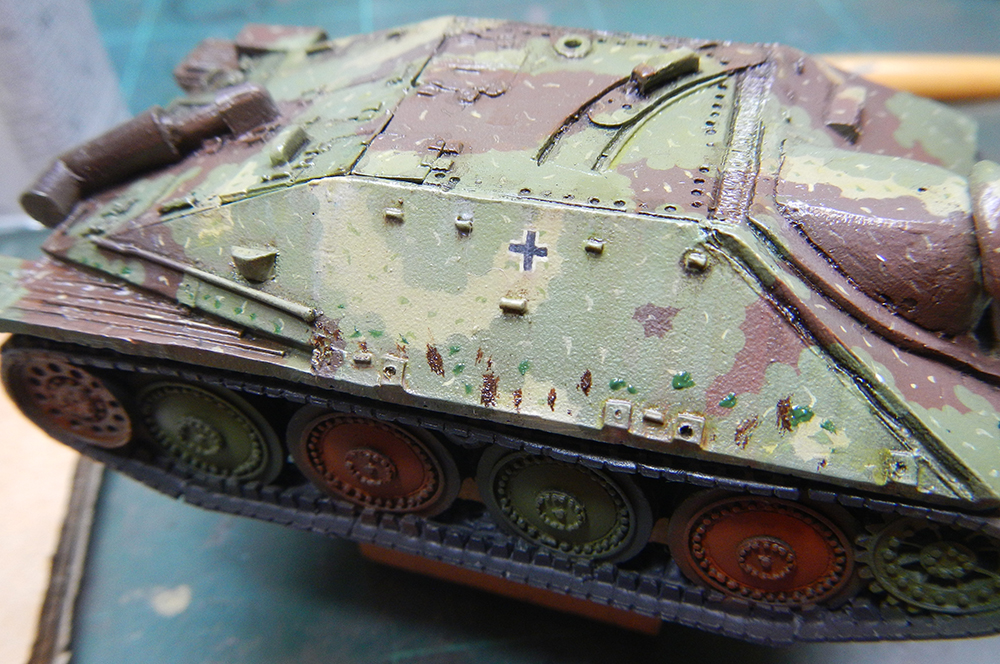 6. First we put small dots with the lighter colors in the upper areas (zone of zenithal light), and with a moistened brush in white spirit, we sweep the oils to the bottom. In the process we remove the major part of the color to get a smooth effect.Hacemos la misma operación, pero en las partes inferiores y con colores más oscuros.
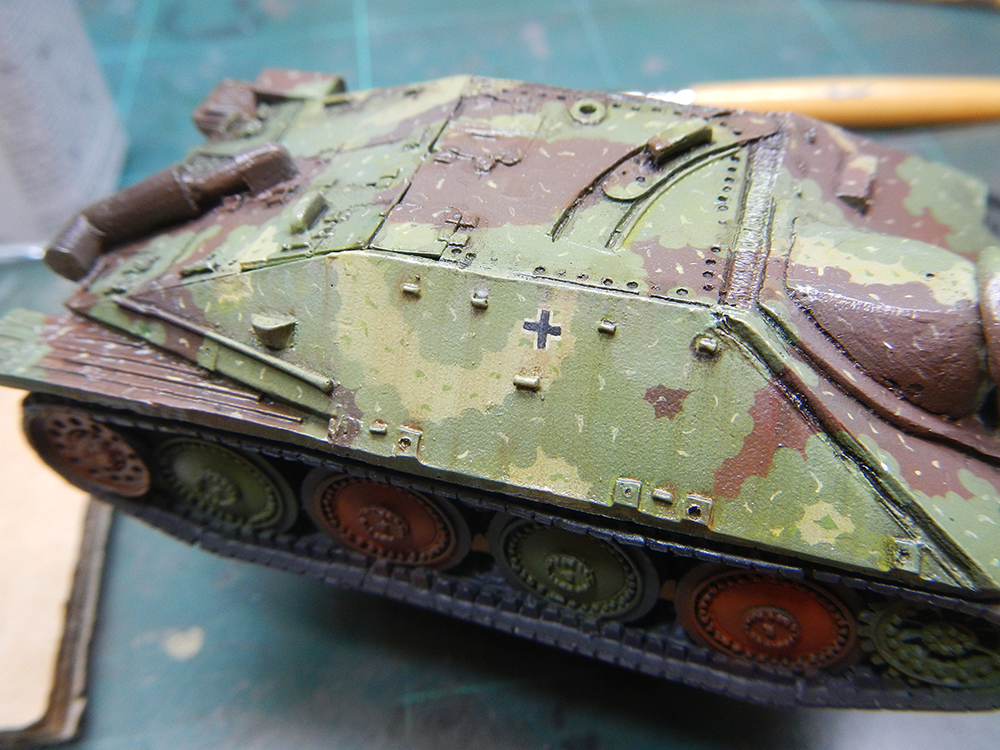
7. Wait before continue. We can accelerate the drying process with a hair dryer or we can even «baking» the vehicle to 50 degrees or less during a hour.
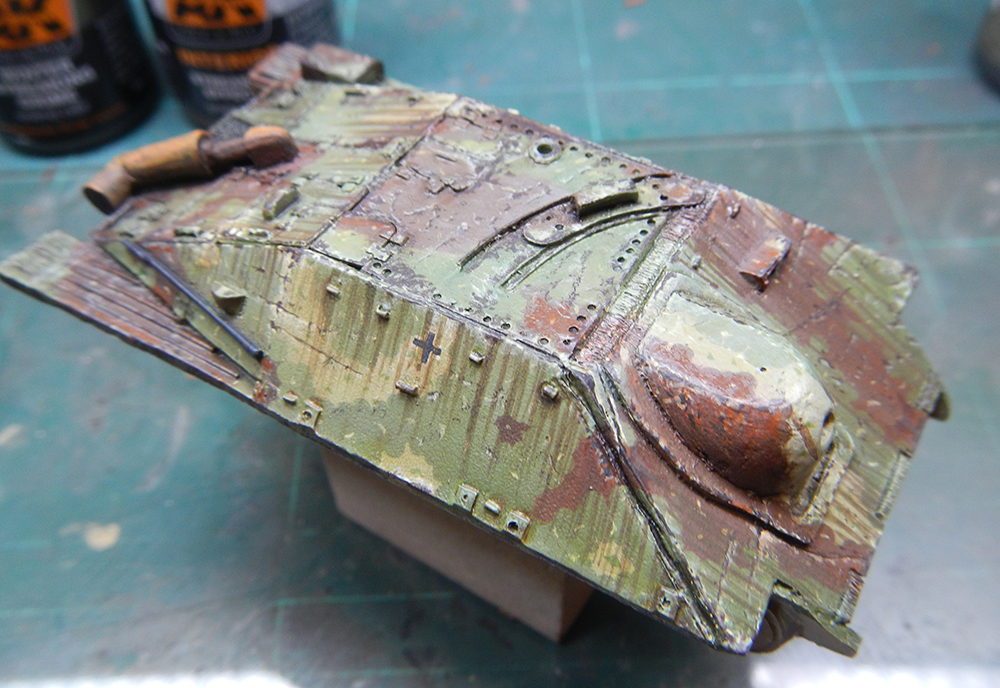
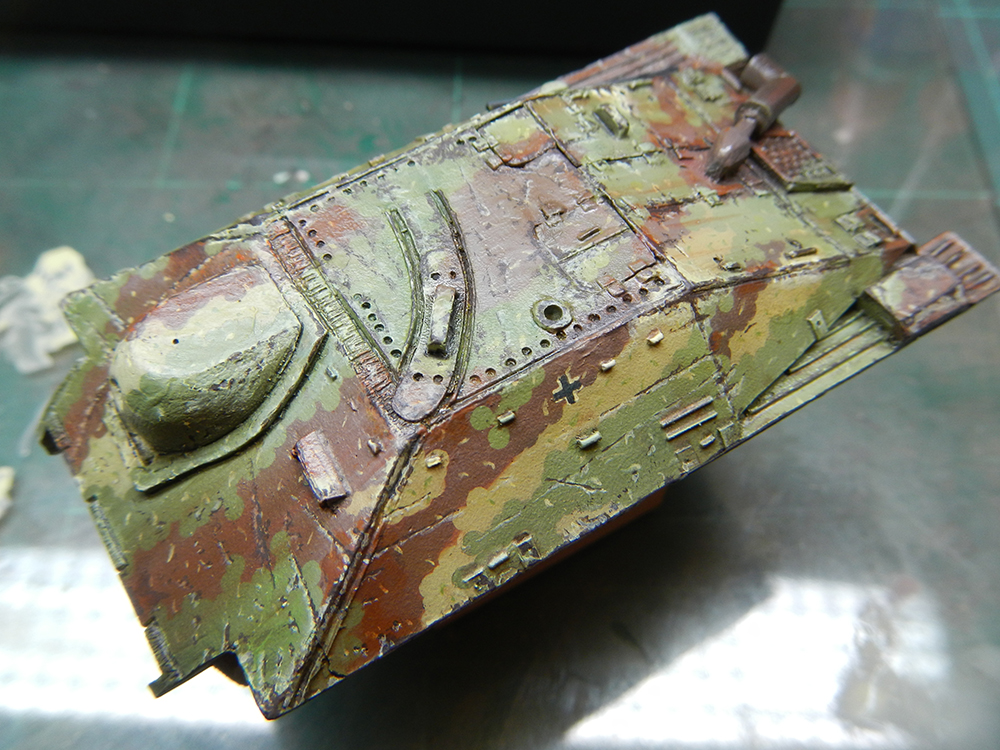 8. We paint the chipping effects following a classical method: lighter color as base, then small details with dark red brown color. It’s important to be as random as we can, but we should search the logic in the weathering: edges, exposed areas, etc.
 9. We paint the exhaust using the LifeColor rust painitng set.
 10. We apply streaking effects using a couple of enamels, and we blend them with a brush moistened in White Spirit, trying to get the maximum chromatic variety. This can be done –and should be done—in several phases, trying to find the higher variety of effects.
 11. After drying, we can start applying dust effects and fresh mud (but those will be a new chapter…other day!).
 12. We can apply the extreme of a pencil in the most exposed areas, where the metal is exposed but not oxidized.
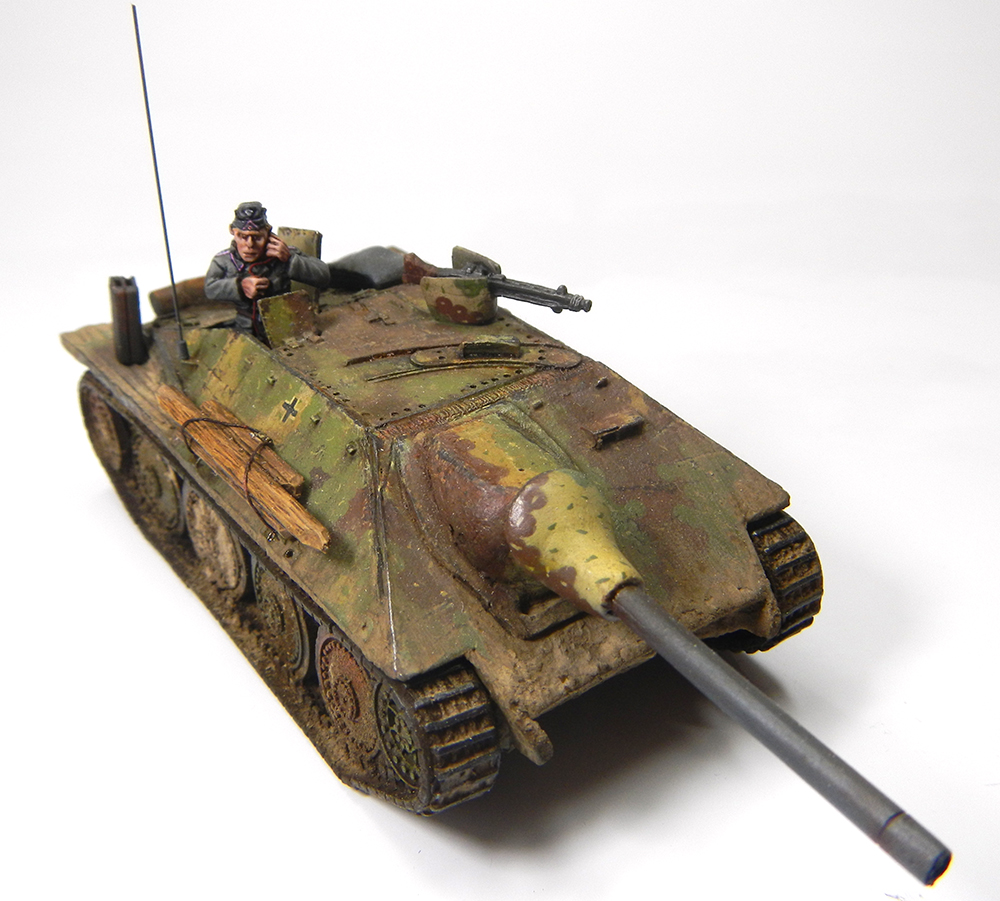
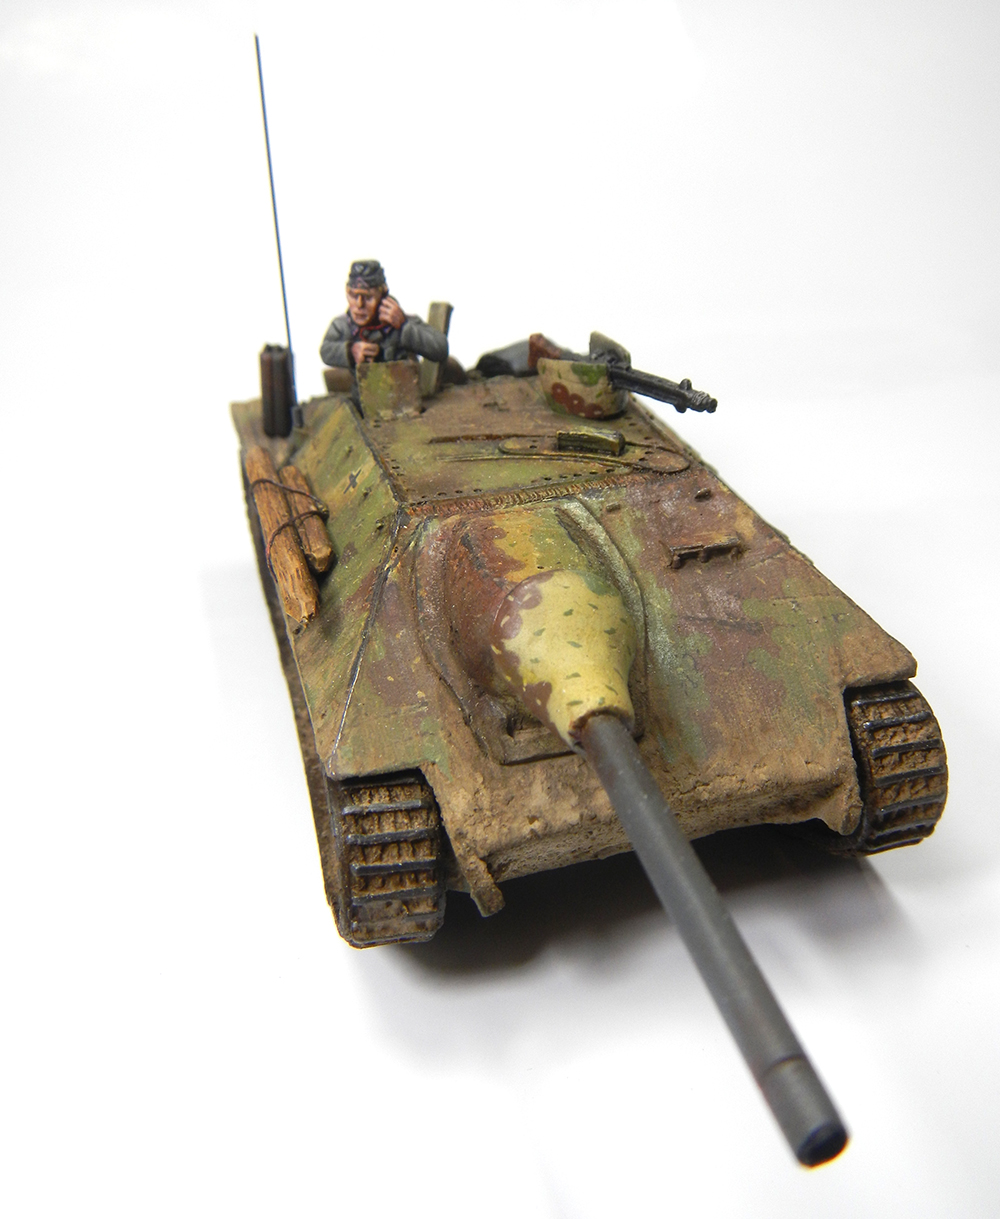
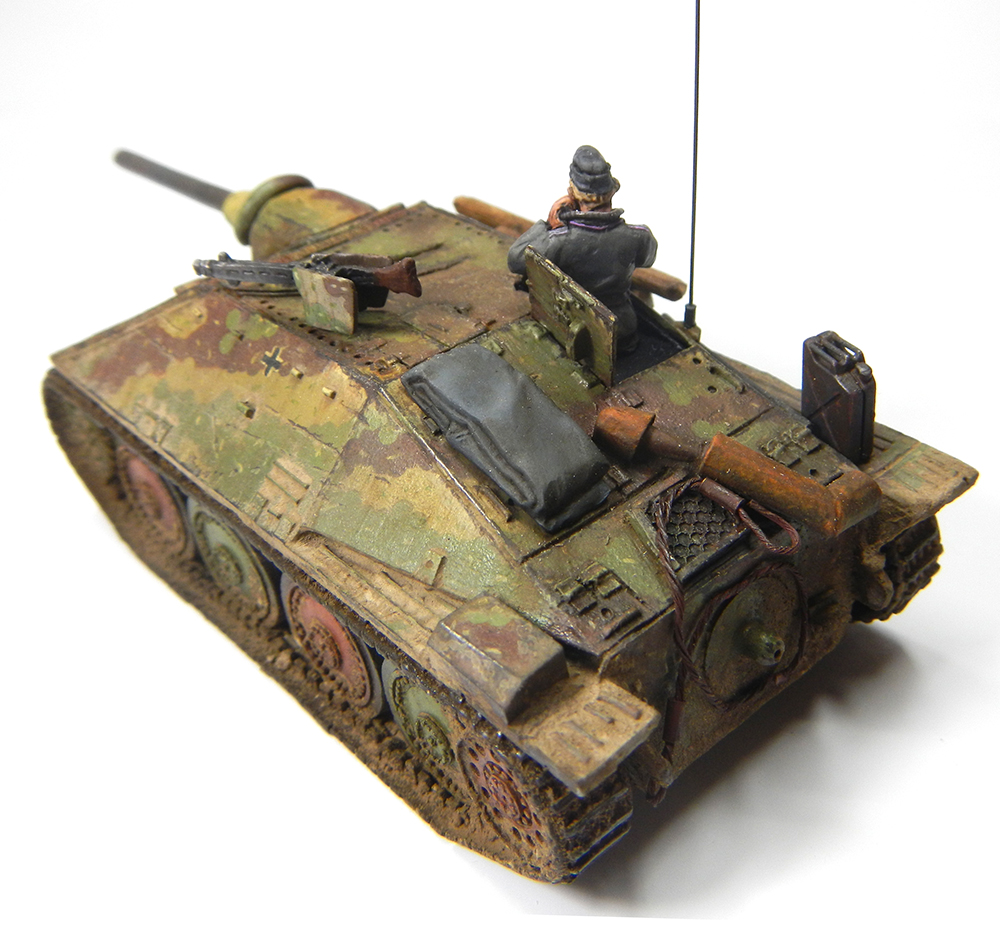
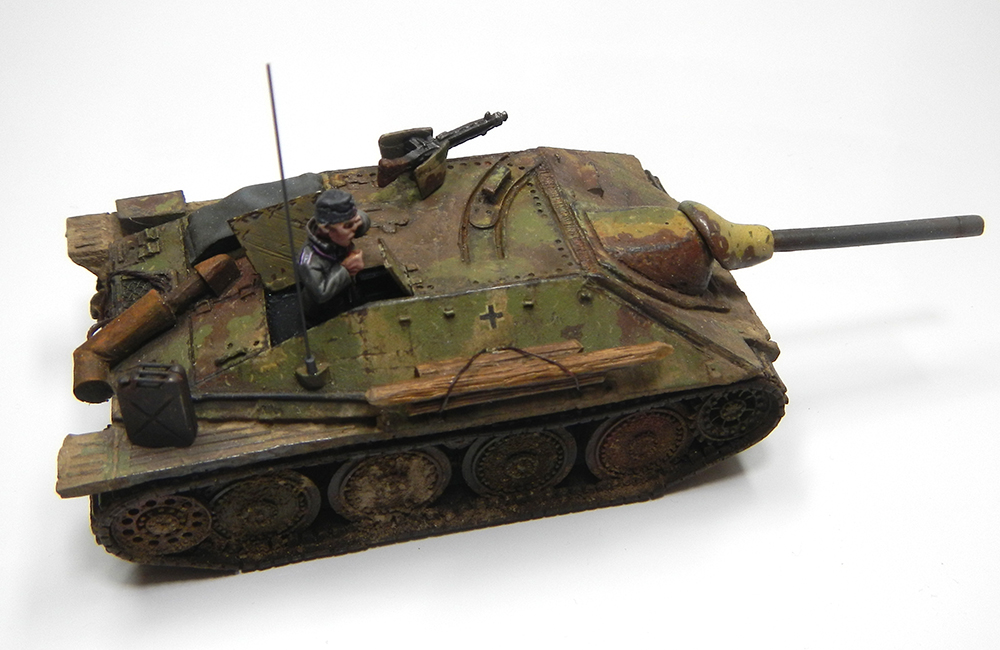 14. We add a tank crew or other element, and the vehicle is finished!.
Final photos:
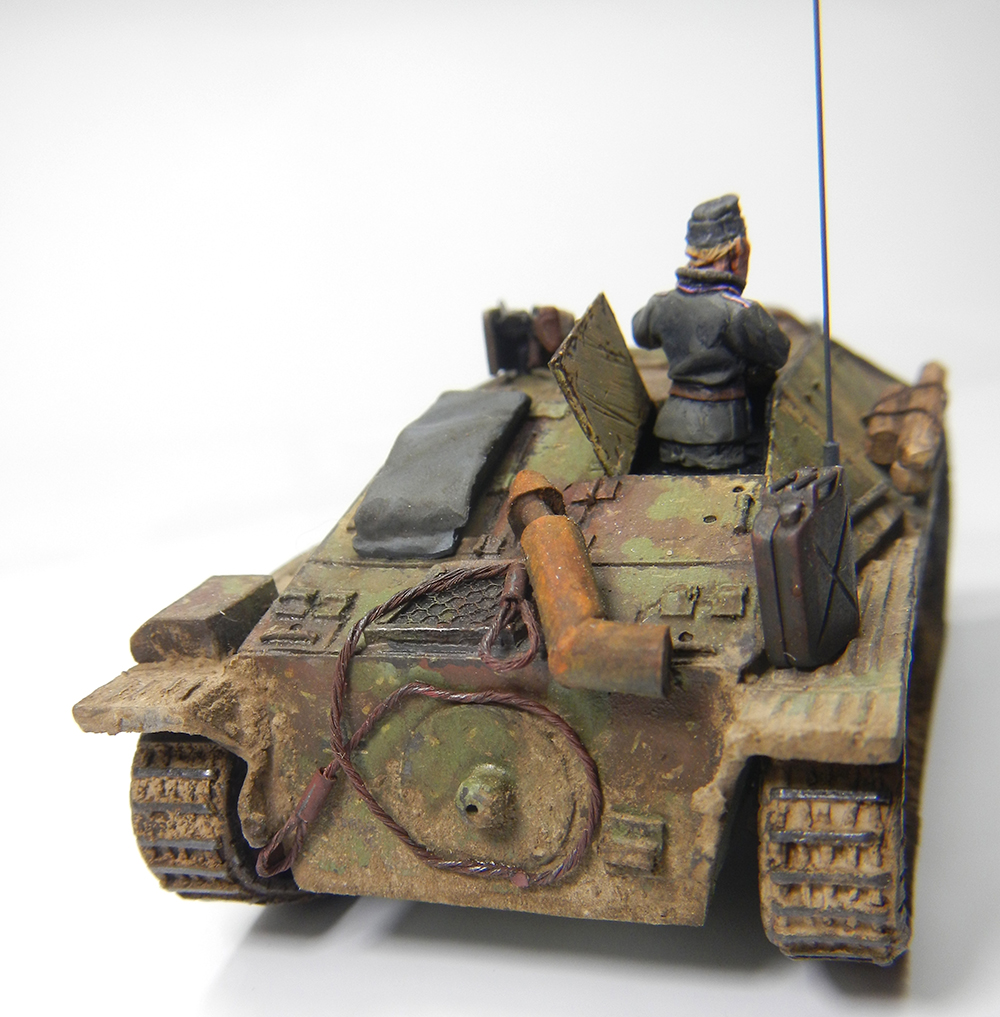
I would very much like to know where you got the petrol can (jerrycan) you used. It is far superior to any I have seen in 1/56.